- General Information
- How to Install Theme
- Theme Activation
- How to Update Theme
- Import Demo Content
- Front Page Setup
- WPDaddy Header & Footer Builder
- How to Edit Header
- How to Edit Footer
- Select Area for Header & Footer
- How to Assign Header & Footer
- How to Enable Sticky Menu
- Page Options
- Page Preloader
- Custom Sidebars
- Translation Support
- FAQ
- Support Desk
- Changelog
11.How to Assign Header & Footer
When your header and footer are ready, you can assign them either globally to the whole website or specific page. To do that, please follow these steps.
Use it as a default header for the whole website:
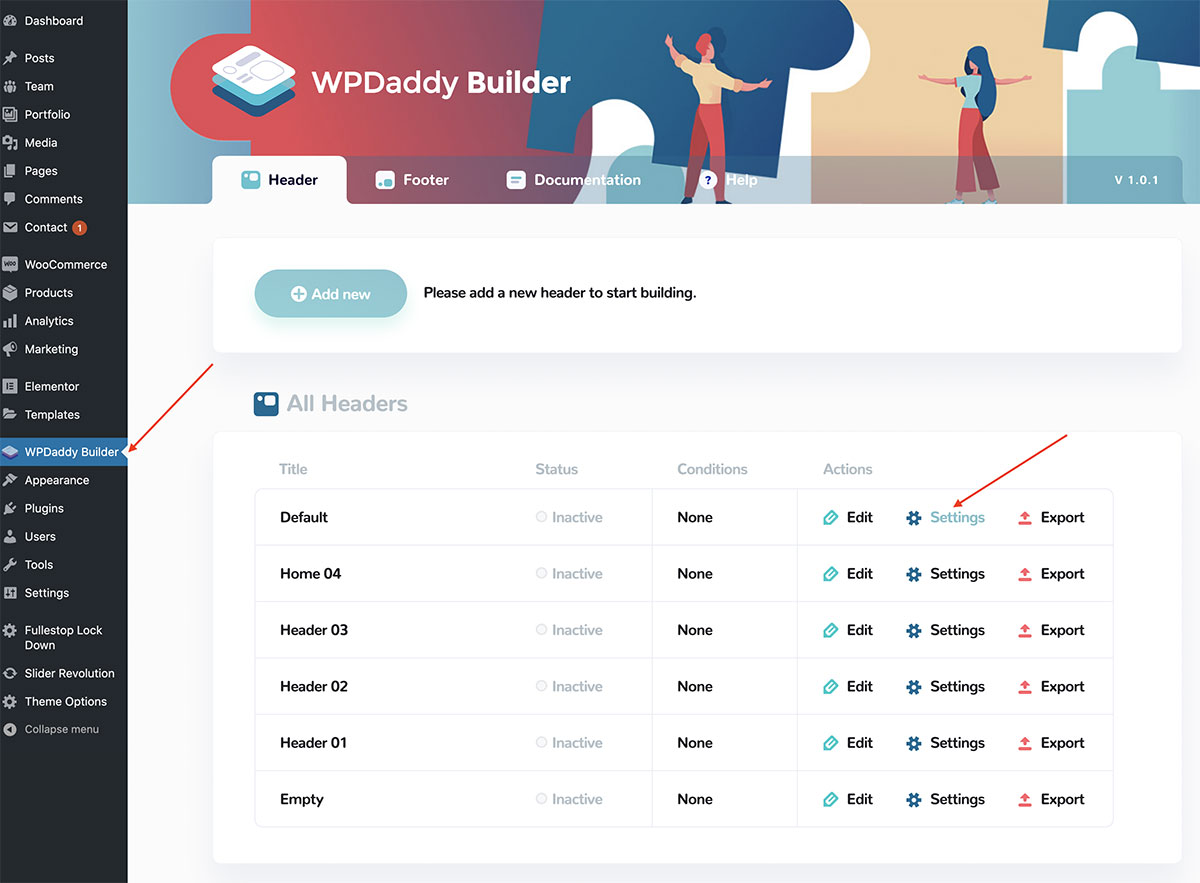
Open WPDaddy Builder section in your WordPress dashboard and click “Settings“.

You will get a popup window with the settings for that specific header.
Make the changes and click “Save Settings“.
Please note: the status “active/inactive” shows the global activity. If the header is assigned to the specific page, the status will be “inactive” here.
Use the header on the specific page:
To do that please open that specific page in Elementor editor. Once it’s opened, you will see WPDaddy Builder control panel.

Please follow the same steps to assign footers.